Today, we will talk about customer addresses and how to create a new address for a customer using Postman in Shopify API.
Table of Contents
Why should you create a new address for a customer?
A new customer’s name, address, and information are automatically added to your customer list when they place an order with your store. When a consumer interacts with your store in any of the following ways, a customer profile is created:
-
- Joining your mailing list or creating a customer account.
-
- Purchasing the Shopify store.
-
- They started an order on the Shopify store but didn’t finish it.
But sometimes, the customers buy through the phone or order on Shopify but pick it up at the store. In some cases, the owner usually needs to manually add their information, including an address, to the Shopify Admin. This action helps the business can manage customer information efficiently. Besides, It can help the business deploy the right target audience for Marketing or customer care campaigns in different regions.
Because of the reasons above, today we will mention how to add a new address for a customer using Postman in Shopify API.
Let’s dive into this subject a little deeper to know more overview.
If this is the first time you make a call in the Postman, you must generate API credentials from the Shopify admin.
Step 1: Generate API credentials from Shopify Admin
Follow the process of How to build a custom app for Shopify in 2022? To know how to access Shopify API.
-
- After creating an app, remember the Admin API access token and the API key to send requests in the Postman.
Step 2: Get a customer_ID from Shopify Admin.
Before creating a new address for a customer, you should get a customer_ID first.
Because the customer_ID is a required parameter in the call.
Follow the steps below to get a cutsomer_ID:
-
- From Shopify Dashboard.
-
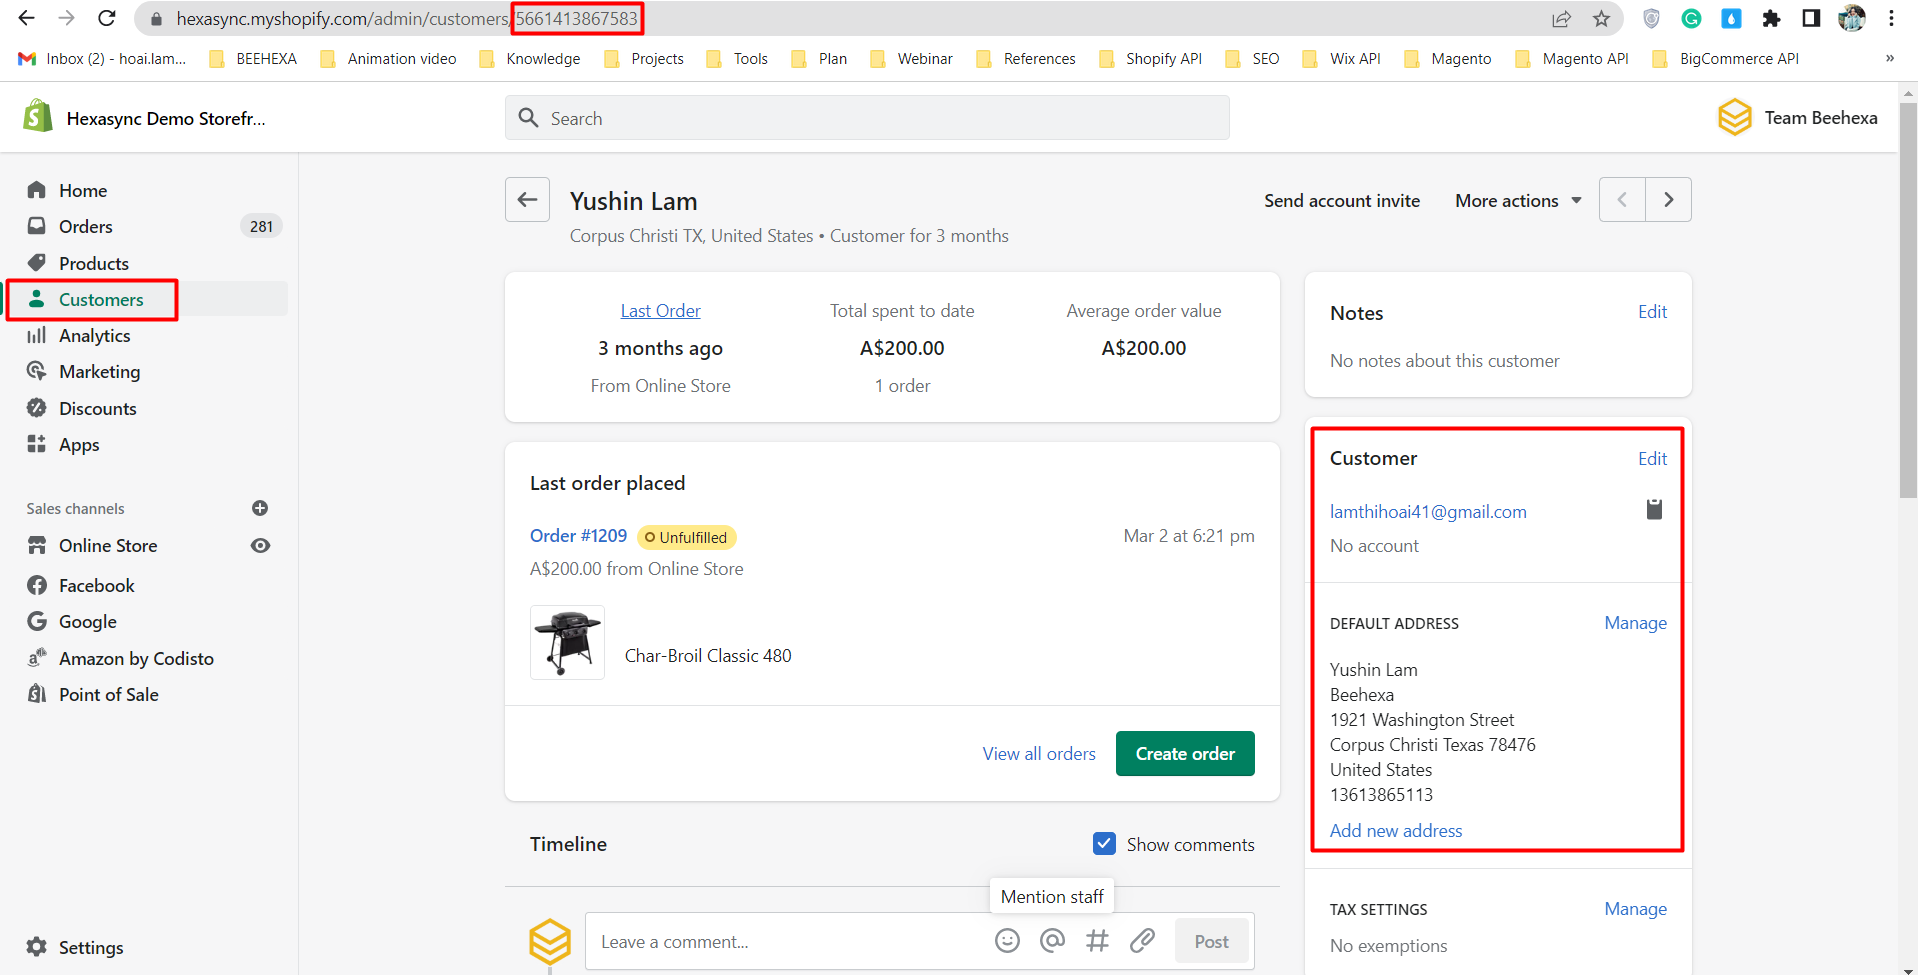
- Go to “Customers”.
-
- Search the customer that you want to create a new address for.
-
- Click on the customer and copy the customer_ID in the URL.
In this article, I will add a new address for a customer named Yushin Lam.


Shopify Bigcommerce Integration


Shopify Wix Integration


Shopify Woocommerce Integration


Shopify Squarespace Integration
Step 3: Create a new address for a customer using Postman
Now, we are ready to create a new customer address with Shopify APIs.
-
- Log in to your Postman and create a new workspace.
-
- Create a new POST with this URL:
https://{API_key}:{admin_API_access_token}@{shop}.myshopify.com/admin/api/{api-version}/{resource}.json
-
- {API_key} – The API key that you generated.
-
- {admin_API_access_token} – The admin API access token that you generated.
-
- {shop} – The name of your development store.
-
- {api-version} – The supported API version that you want to use.
-
- {resource} – A resource endpoint from the REST Admin API.
Or you can copy this example, remember change {resource} to {customers/customer_ID/addresses}:
https://ed86d512a2c95387ffa25f67074a222b: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@hexasync.myshopify.com/admin/api/2021-10/customers/5661413867583/addresses.json
-
- Paste the URL above.

In the body section, enter the code:
{
    "address": {
        "address1": "1 Rue des Carrieres",
        "address2": "Suite 1234",
        "city": "Montreal",
        "company": "Fancy Co.",
        "first_name": "Yushin",
        "last_name": "Lam",
        "phone": "819-555-5555",
        "province": "Quebec",
        "country": "Canada",
        "zip": "G1R 4P5",
        "name": "Samuel de Champlain",
        "province_code": "QC",
        "country_code": "CA",
        "country_name": "Canada"
    }
}
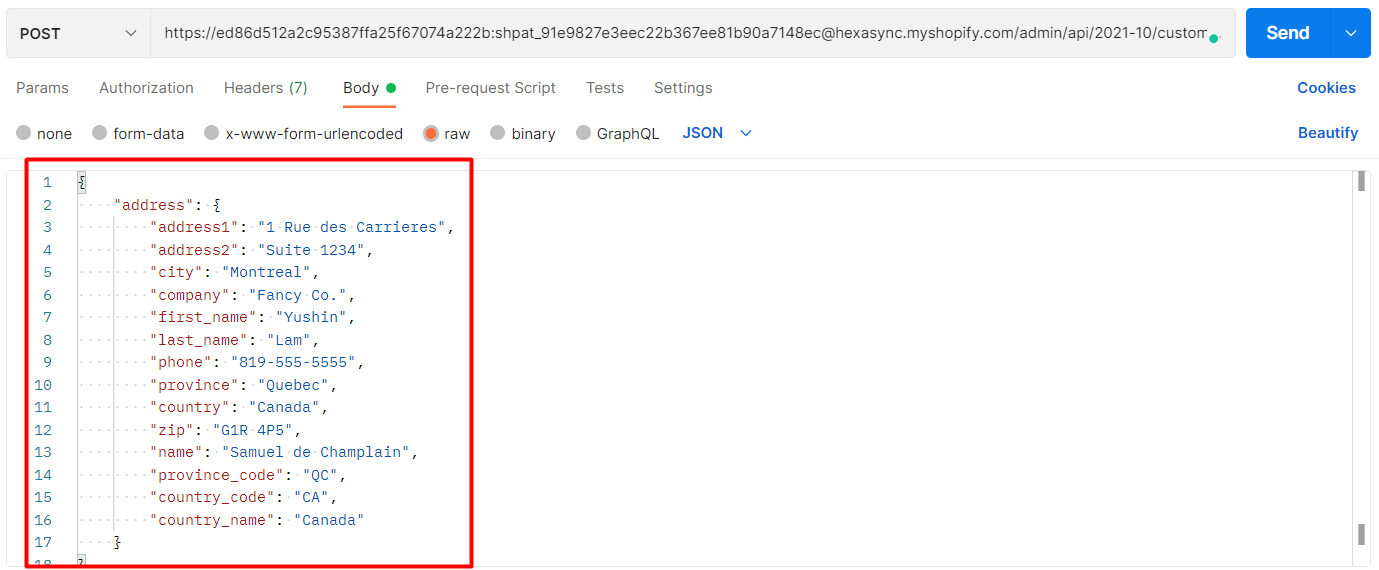
Then click Send
Response:
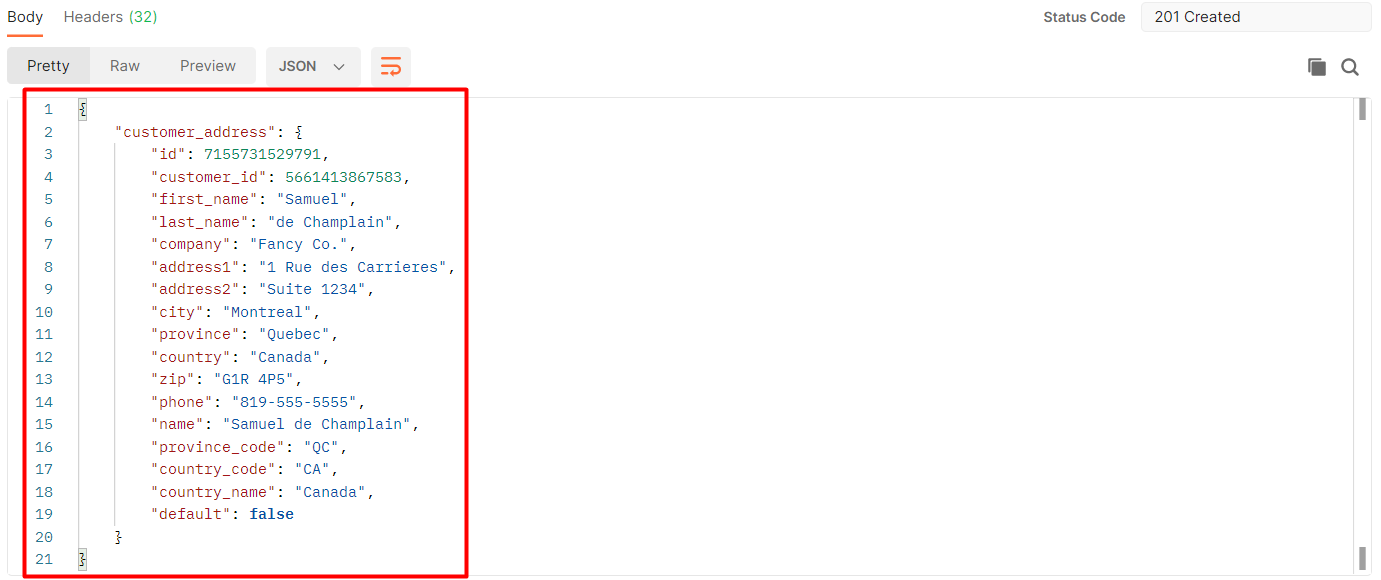
The API will return the data like this.
{
    "customer_address": {
        "id": 7155731529791,
        "customer_id": 5661413867583,
        "first_name": "Samuel",
        "last_name": "de Champlain",
        "company": "Fancy Co.",
        "address1": "1 Rue des Carrieres",
        "address2": "Suite 1234",
        "city": "Montreal",
        "province": "Quebec",
        "country": "Canada",
        "zip": "G1R 4P5",
        "phone": "819-555-5555",
        "name": "Samuel de Champlain",
        "province_code": "QC",
        "country_code": "CA",
        "country_name": "Canada",
        "default": false
    }
}
Step 4: Verify the new customer address
After creating the new customer address, we can check it in Shopify Admin.
-
- From Shopify Admin, choose “Customers”.
-
- Search for the customer you just created with the new address.
-
- Click on the customer.
-
- Scroll down to the customer section and click on “Manage”.
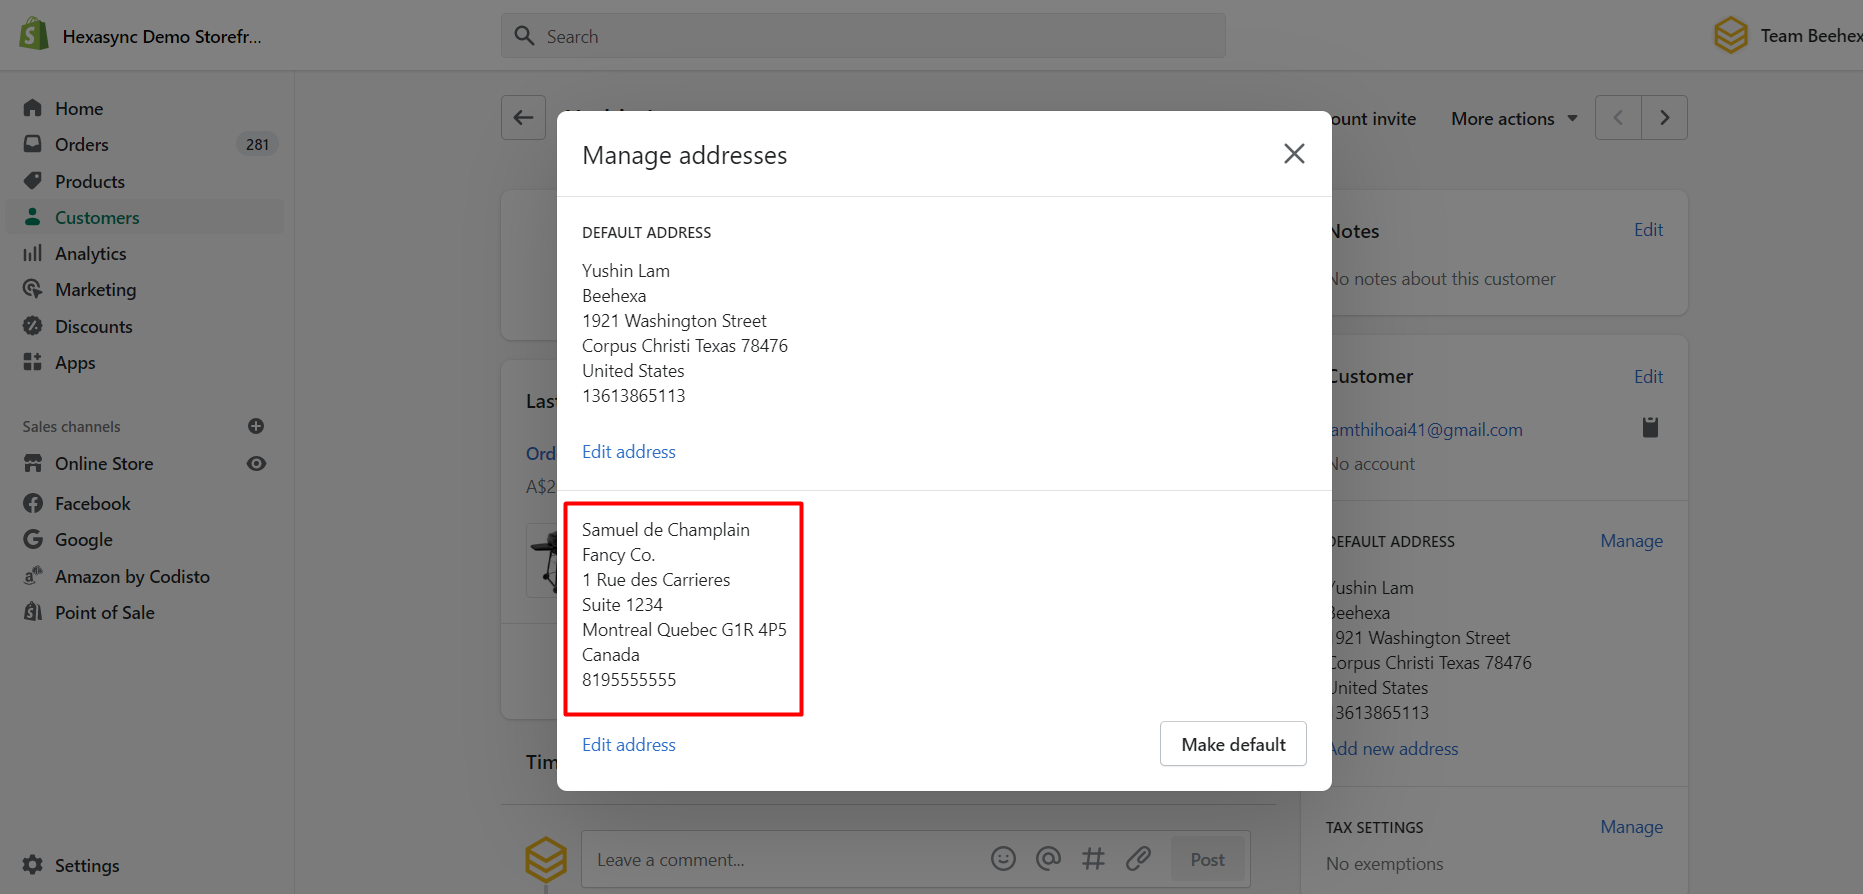
As you can see, the new address has been added to the customer.
The above are all steps to create a new address for a customer using Postman with Shopify API.
If you have questions about Shopify customer address API, let us know in the comment below or refer to our Shopify API integration.
These steps will be shown visually in the video below. Click on the video to watch more about the Shopify API tutorial.
Hopefully, you can do it!


